Card Accounts
Business Accounts
Other Accounts
Personal Cards
Business Credit Cards
Corporate Programs
Personal Travel
Travel Inspiration
Business Travel
Membership Rewards
Card Rewards and Benefits
Cash Back
Business Solutions
Funding and Payment Products
Other Business Solutions

Card Accounts
Business Accounts
Other Accounts
Personal Cards
Business Credit Cards
Corporate Programs
Personal Travel
Travel Inspiration
Business Travel
Membership Rewards
Card Rewards and Benefits
Cash Back
Business Solutions
Funding and Payment Products
Other Business Solutions
-

Home
Return to take the tour or explore on your own
-
Home
-
Card Program Summary
-
Card Member Overview
-
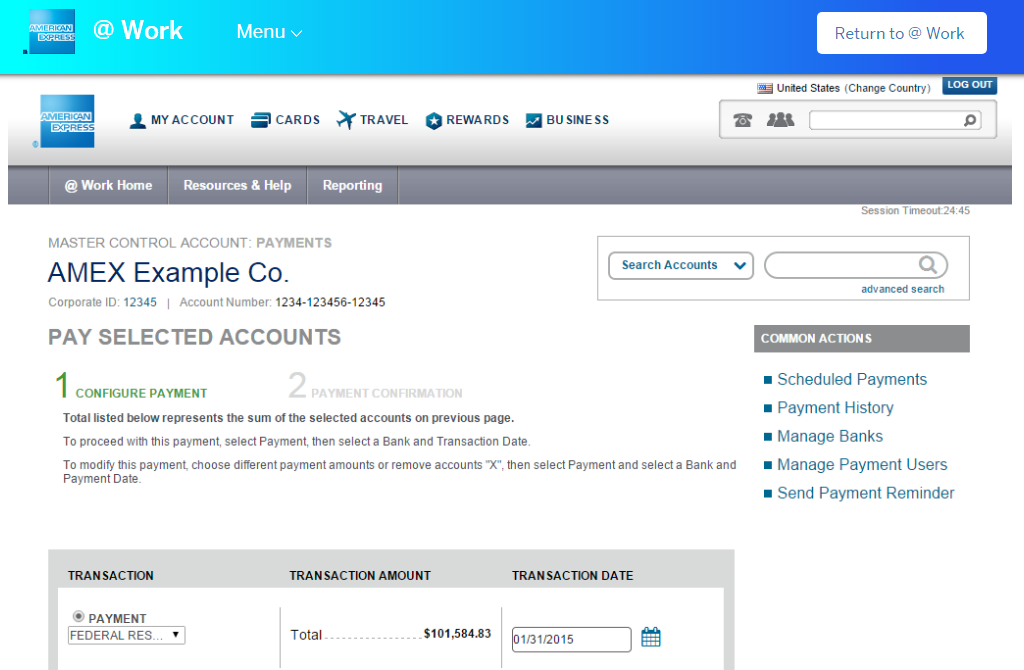
Confirm payment
-
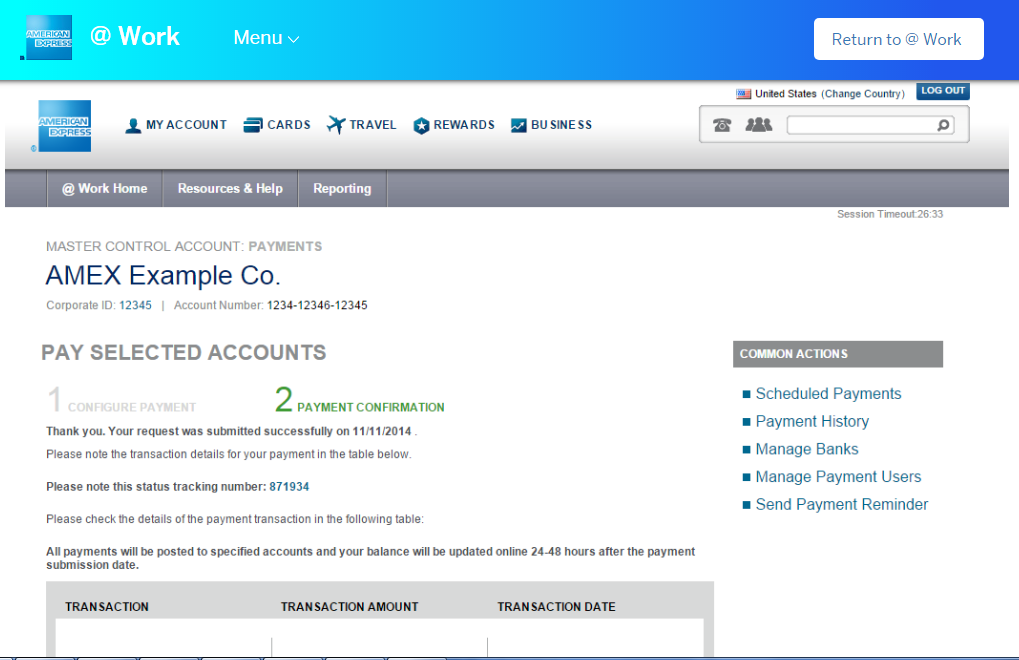
Payment Confirmation
-
Payment Confirmation
-
Payment Confirmation
-
Payment Confirmation
-
Payment Confirmation
-
Payment Confirmation
-
Payment Confirmation
-
Payment Confirmation
-
Payment Confirmation
-
Payment Confirmation
-
Payment Confirmation
-
Payment Confirmation
-
Payment Confirmation
-
Payment Confirmation
-
Payment Confirmation
-
Payment Confirmation
-
Payment Confirmation
-
Payment Confirmation
-
Payment Confirmation
-
Payment Confirmation
-
Payment Confirmation
Welcome to the American Express @ Work® Reconciliation Tour
We are on a journey to give you best-in-class digital solutions to help manage your Card expense allocations. Click "Take the tour" to launch a guided tour of the end user experience or explore on your own.
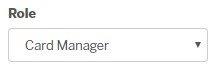
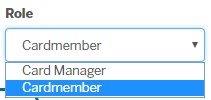
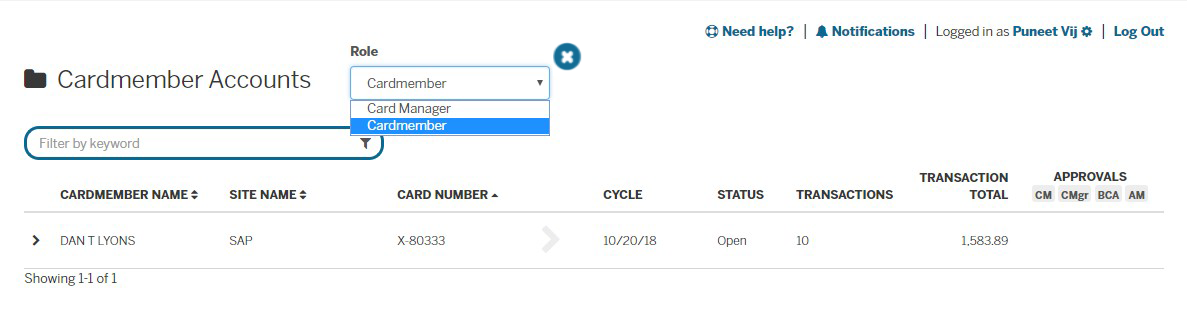
If you have more than one role, use the dropdown to select the correct one.
Click on the role indicated
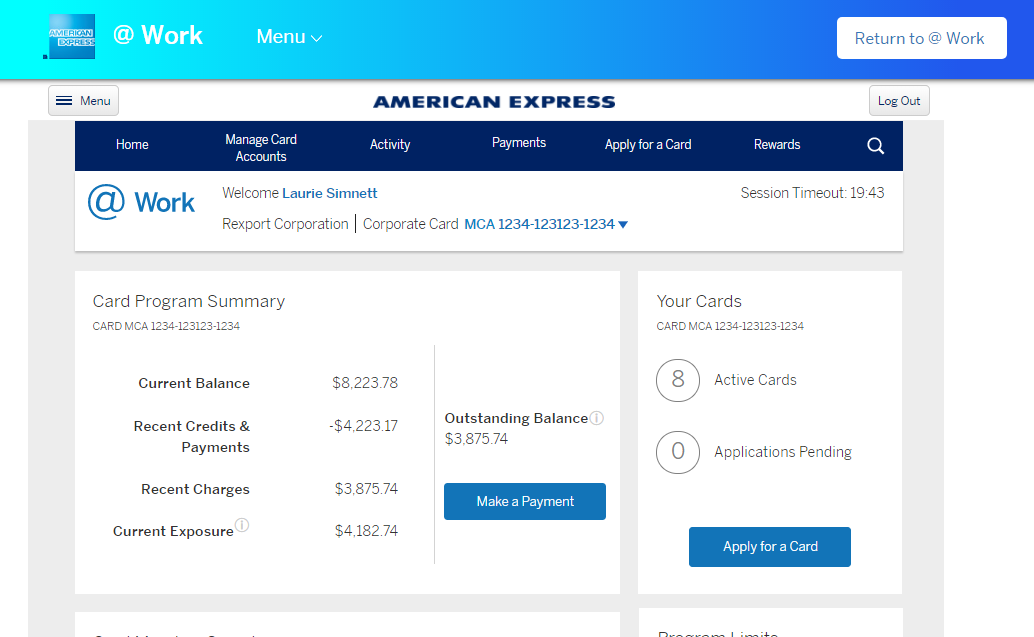
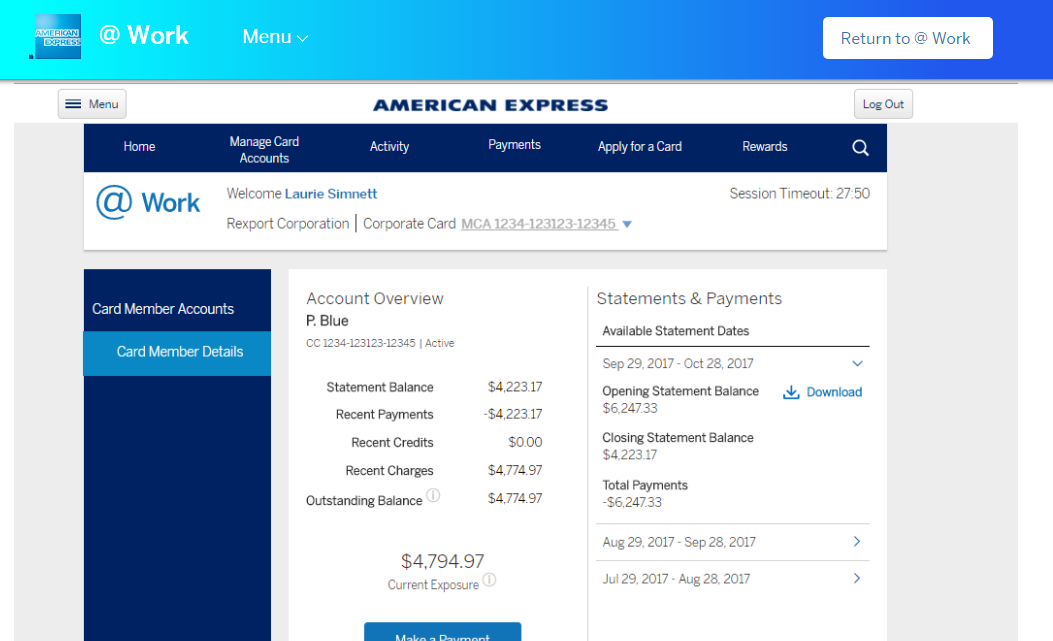
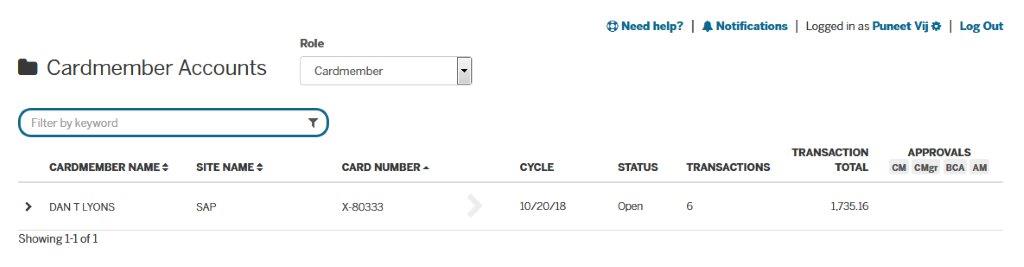
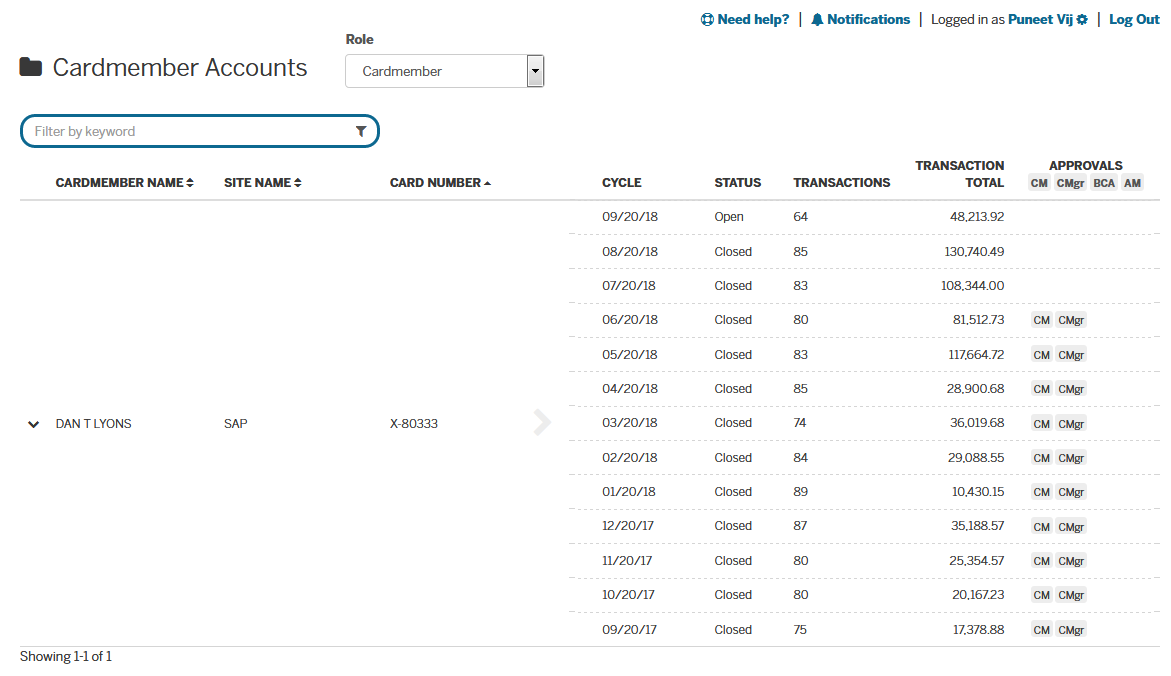
Upon log in, you will see the Accounts Summary page. The default view shows the available cards and their current Billing Cycles. Simply select the account and use the arrow to expand the view to see up to 12 previous Billing Cycles.
Click on the Card Member name

 Quick view of employees that have cards and their balances. Click on Card Member name to view more information on the specific card.
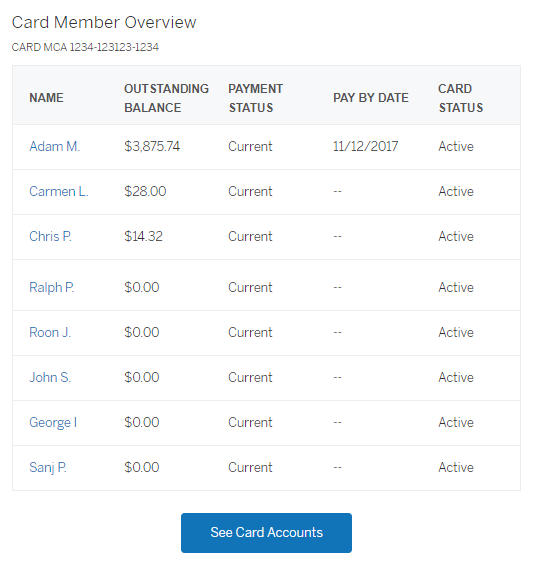
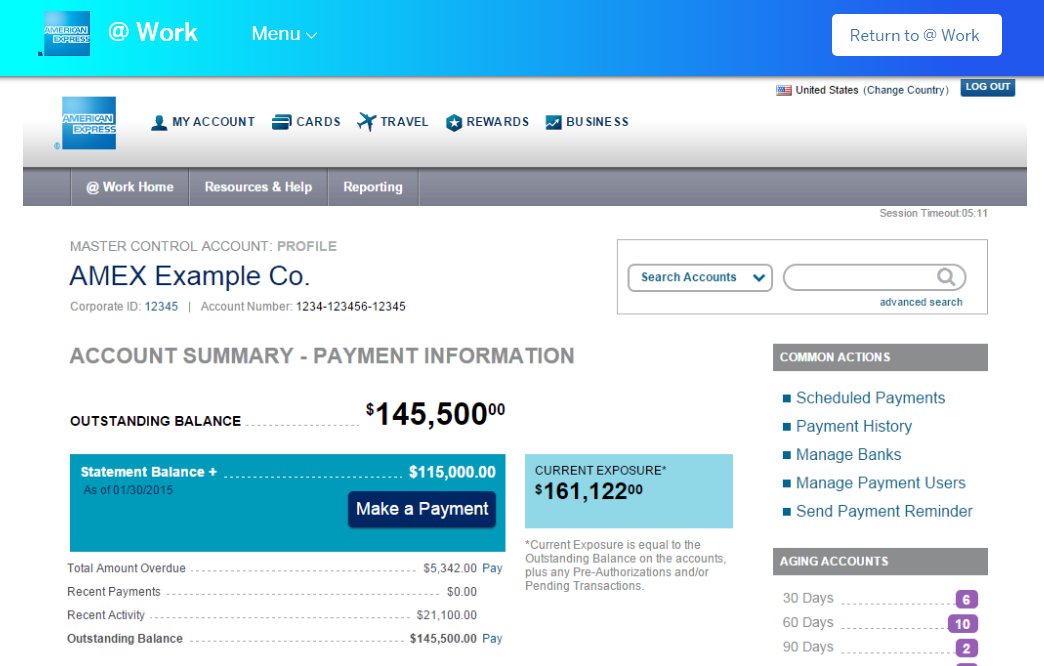
 Have visibility & control of your program with an easy view of the main indicators like your Program limit, spend and your higher.
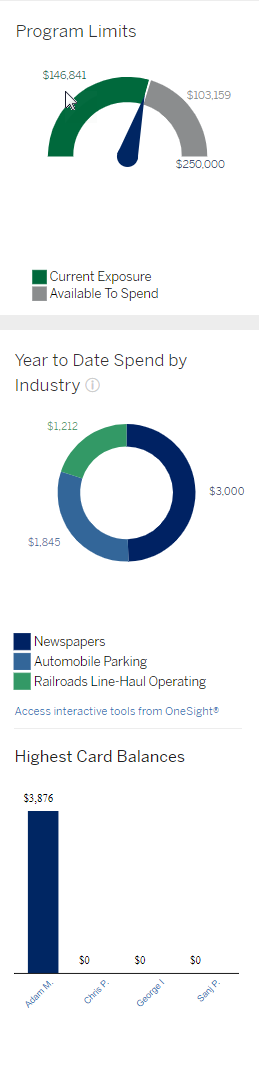
 Review, sort and download the most recent activity for the Card Members in your program.
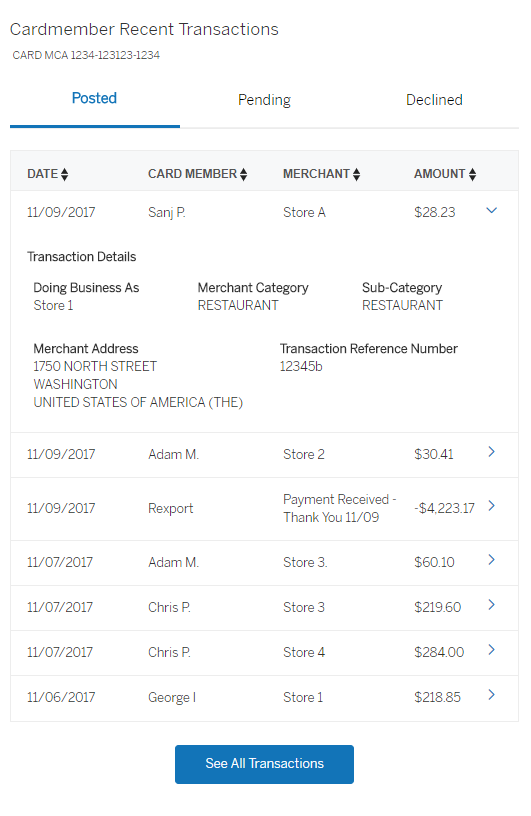
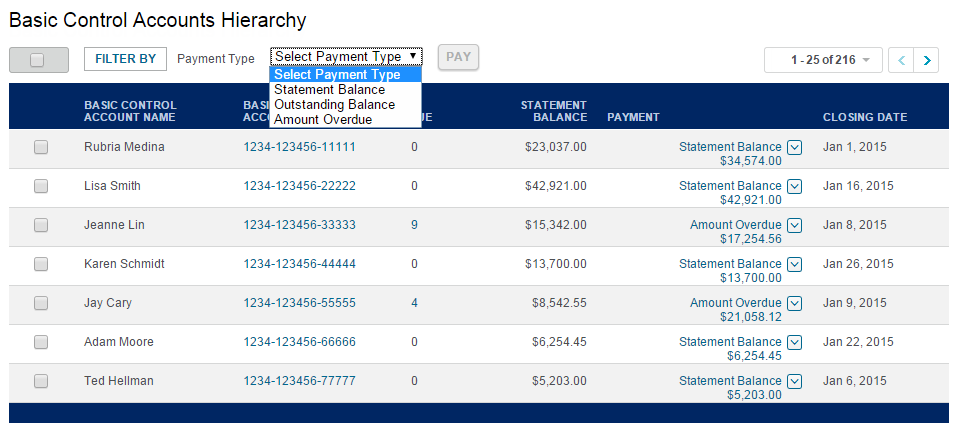
 Click on Make a Payment to pay in full at the company level for statement balance, Outstanding Balance or Amount Over due.
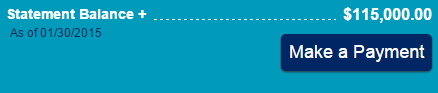
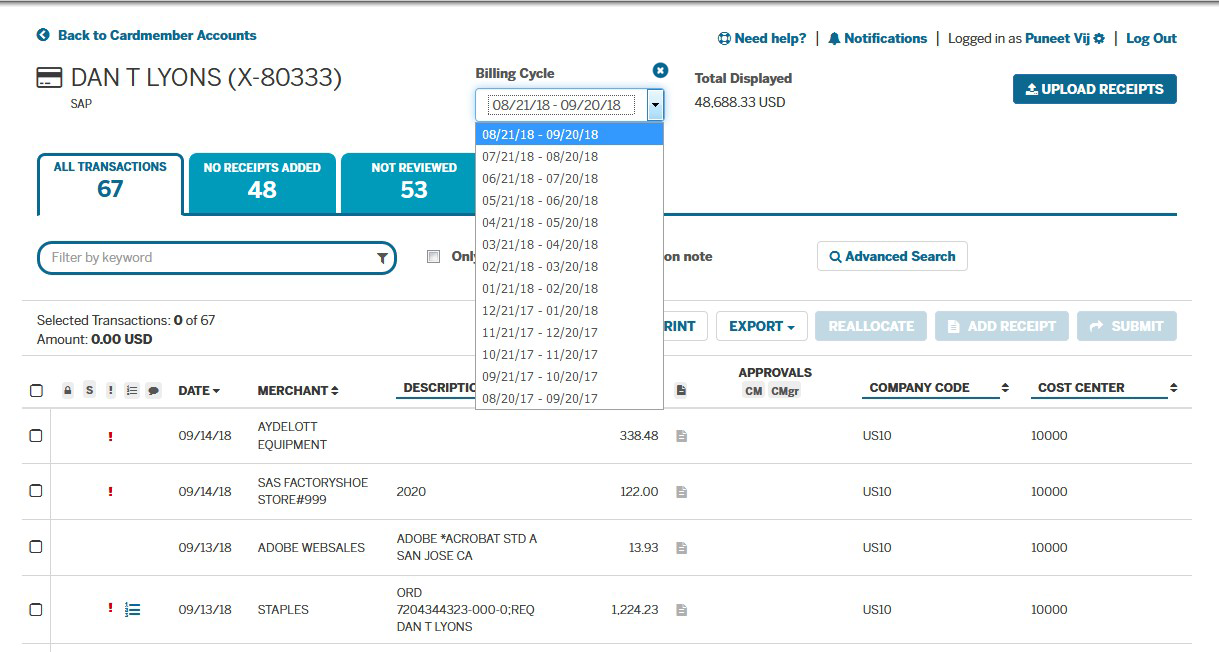
Click on the Billing Cycle of your choice to open the Transaction Summary view.
Click on the cycle date indicated
 Click on Make a Payment to pay in full at the company level for statement balance, Outstanding Balance or Amount Over due.
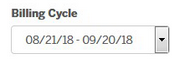
You can change the Billing Cycle by clicking on the dropdown menu.
Click on the Billing Cycle
Click here to upload receipts to the receipt pool.
Use this search engine to find a transaction if the keyword search is not enough.
Click on the search box
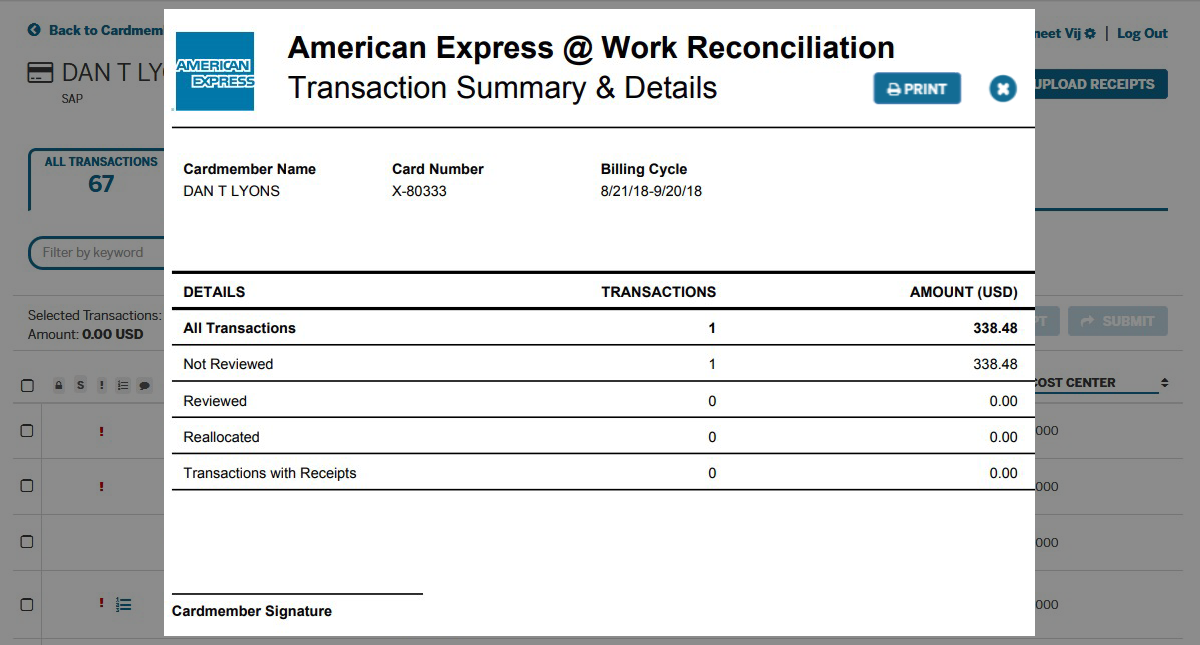
Click here to print a summary of your transactions for the selected cycle.
Click the Print button
Click here to export your transactions into a CSV file based on the data fields you select.
Click the Export button
Click on the transaction to open the Transaction Details view.
Click on the indicated transaction
The Transaction Summary view includes action tabs based on your business rules. These tabs allow you to quickly assess what needs to be done in order to complete the reconciliation process.


You can change the Billing Cycle by clicking on the dropdown menu.
Click on the Billing Cycle
Click here to upload receipts to the receipt pool.
Use this search engine to find a transaction if the keyword search is not enough.
Click on the search box
Click here to print a summary of your transactions for the selected cycle.
Click the Print button
Click here to export your transactions into a CSV file based on the data fields you select.
Click the Export button
Click on the transaction to open the Transaction Details view.
Click on the indicated transaction
The Transaction Summary view includes action tabs based on your business rules. These tabs allow you to quickly assess what needs to be done in order to complete the reconciliation process.
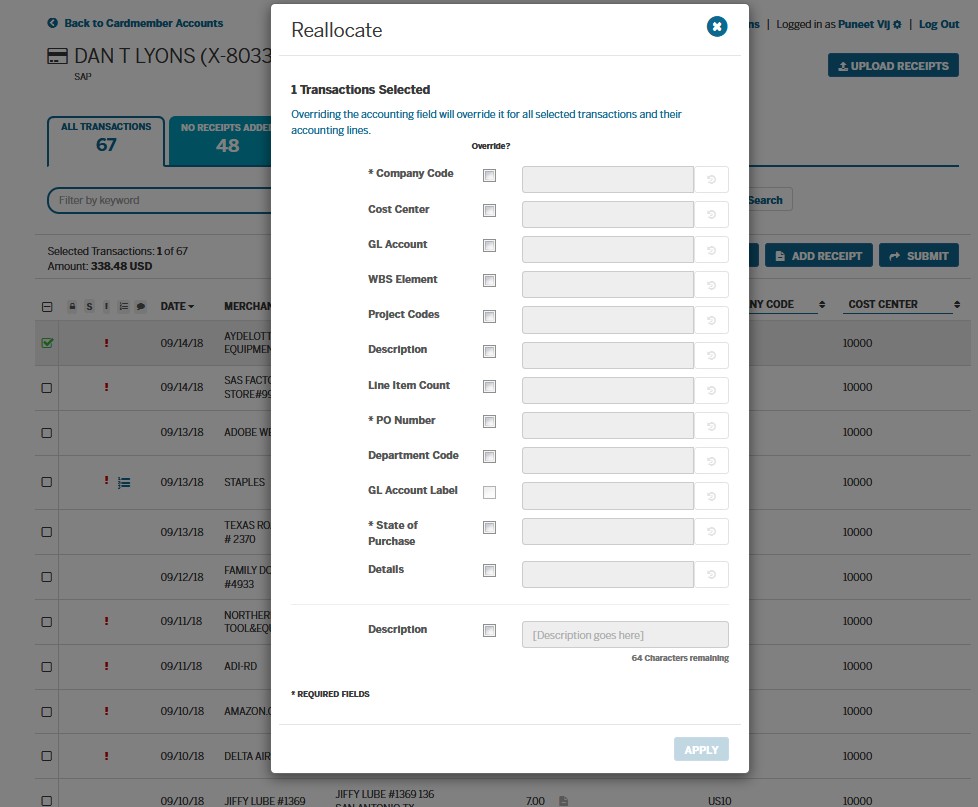
Select the transaction(s) and click here to change the accounting code allocations as necessary.
Click the Reallocate button


Select which Accounting fields should be overridden, select the correct code and click Apply.
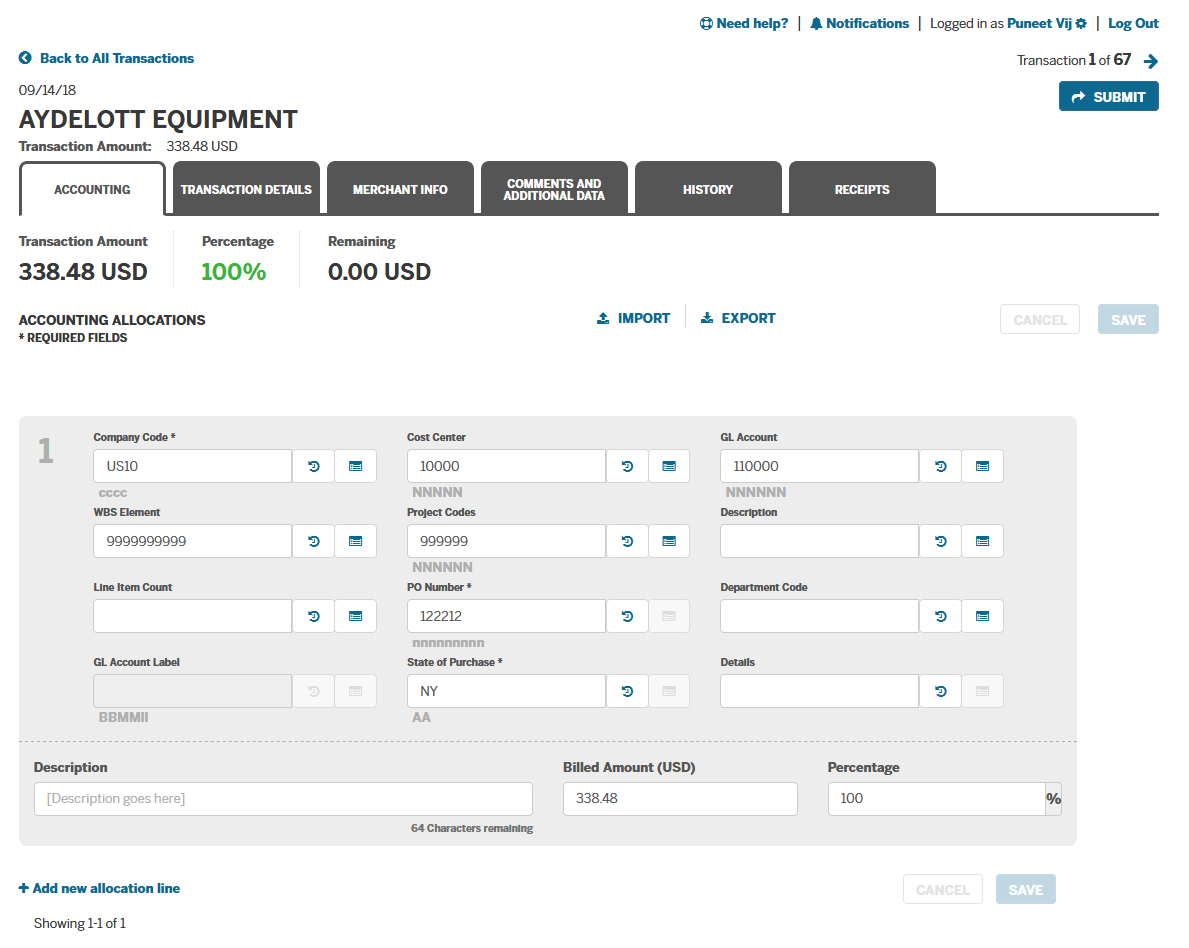
Use the Accounting tab to view accounting information and reallocate transactions if needed.
Click the Transaction Details tab to view specific transaction information.
Click the Merchant Info tab to review specific details provided by the supplier.
Use the Comments and Additional Data tab to review or add notes to the transaction.
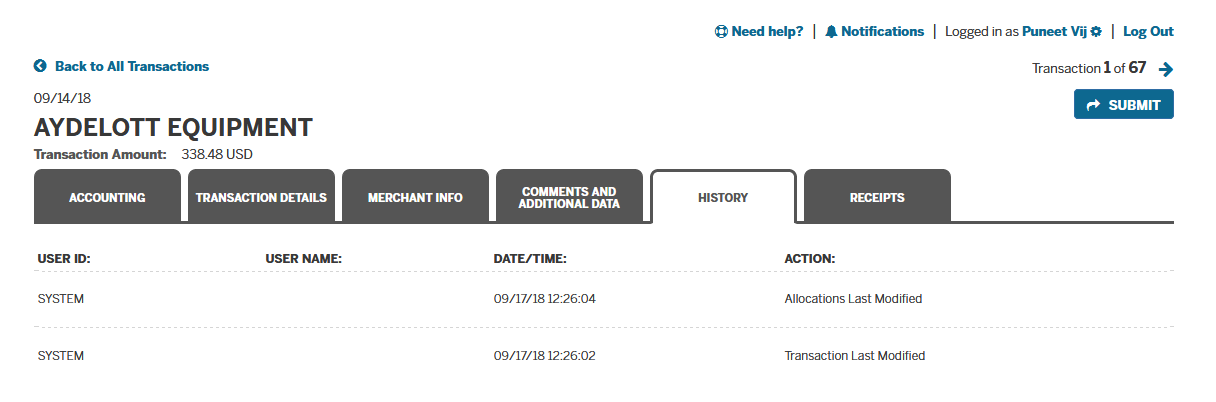
The History tab provides a listing of the last changes made to the transaction.
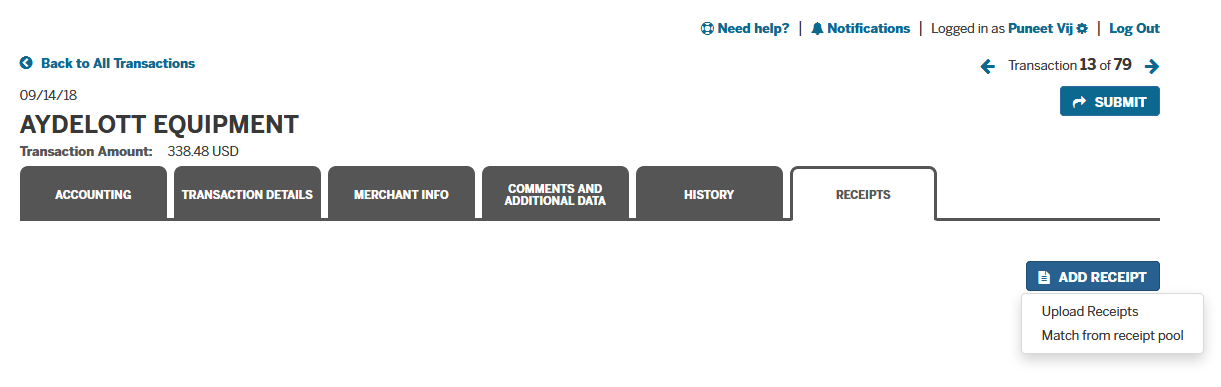
Use the Receipts tab to upload receipts to the transaction.
Click the Submit button when you are ready for the transaction allocation to be approved.
Click Homepage to end tour
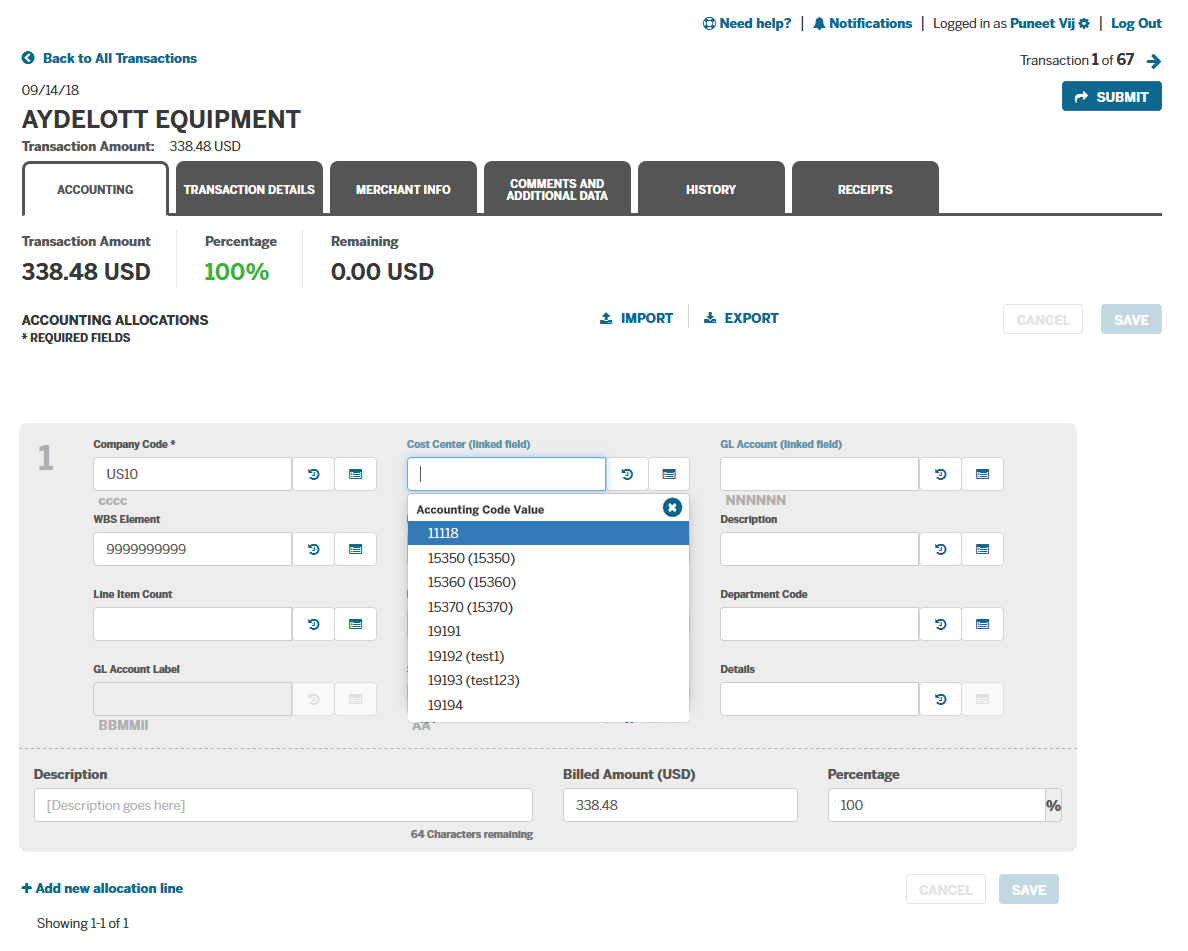
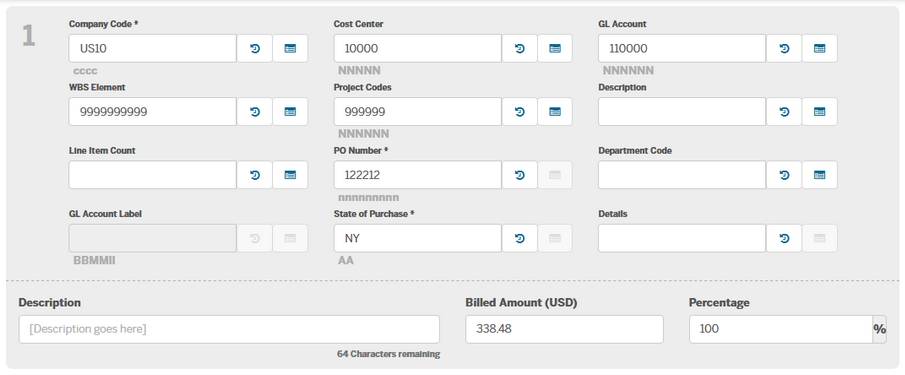
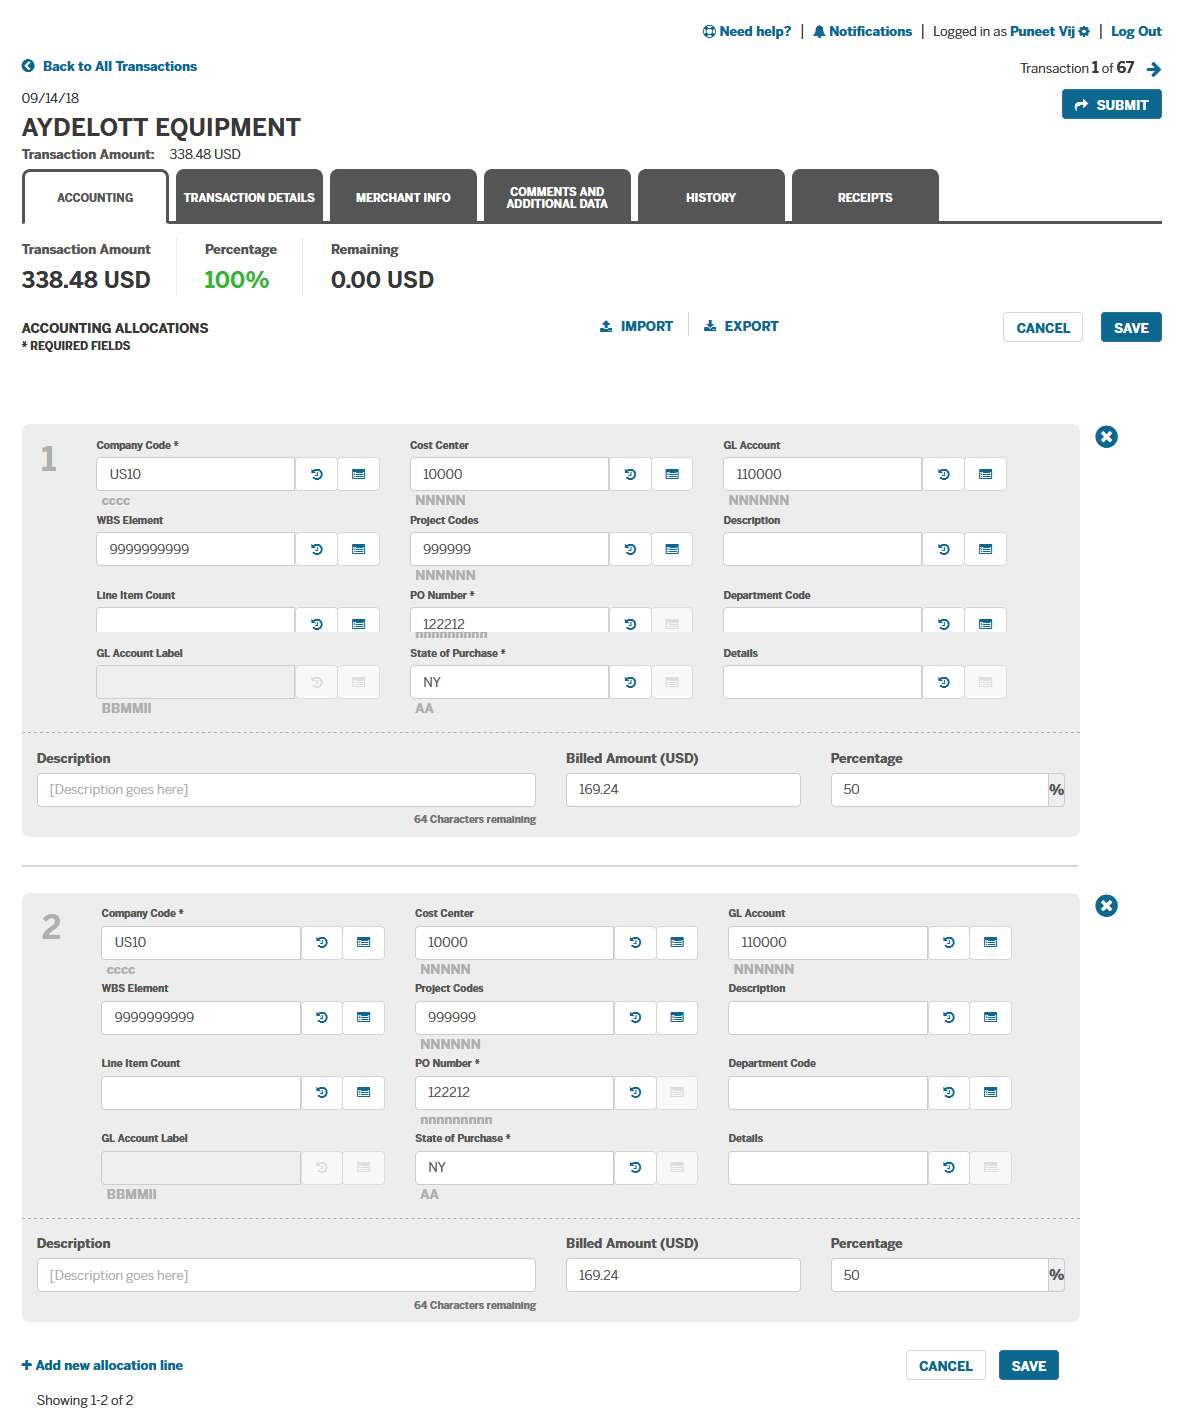
On the Accounting tab, you'll see the default accounting codes applied based on your organization's validation rules. You can accept or change individual allocations as needed.
To split an allocation, add a new allocation line.
Click + Add new allocation line
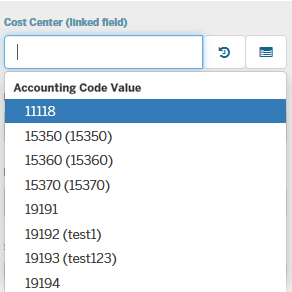
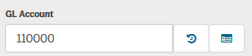
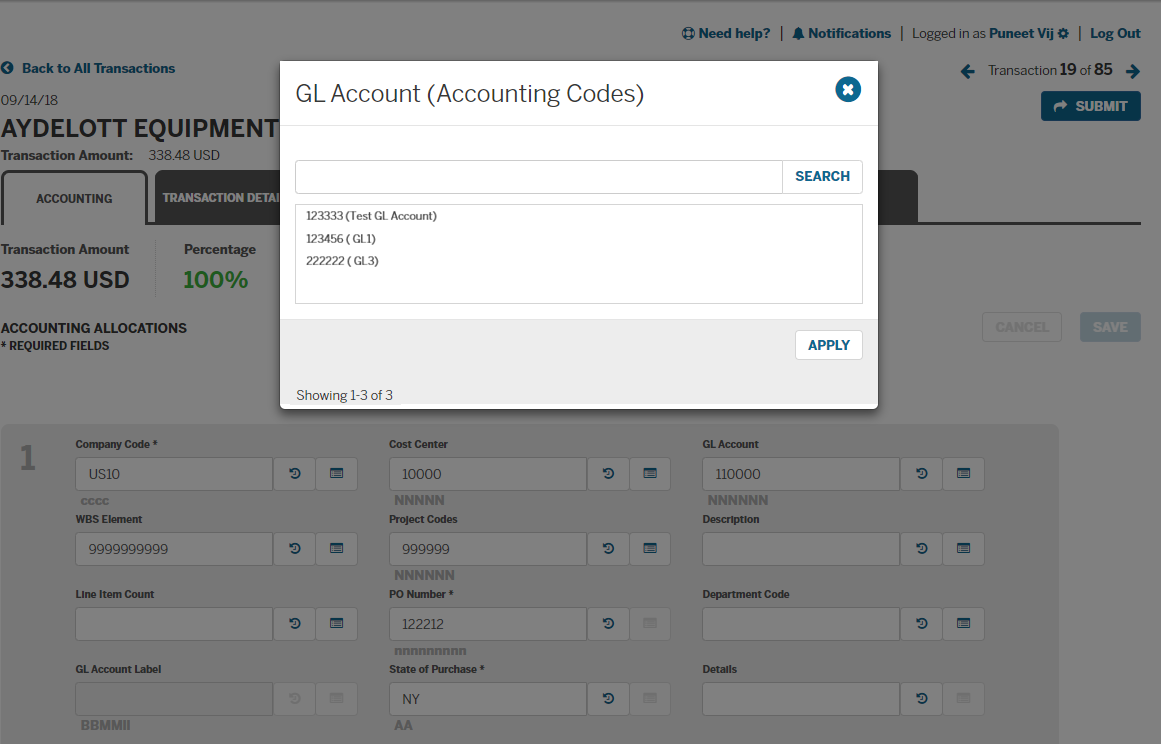
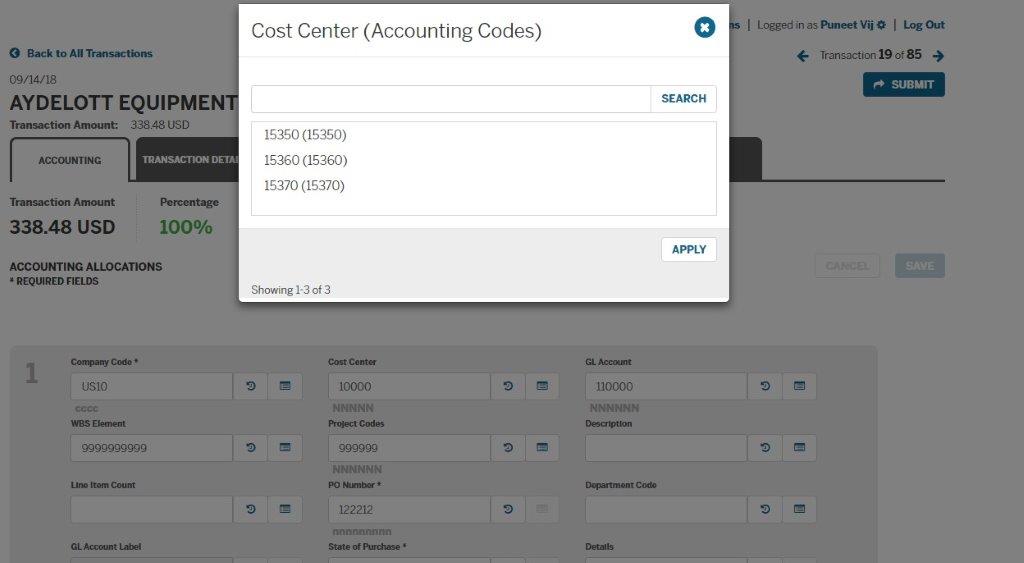
Change individual allocations by typing a valid code directly into the field, choosing from a list of recently used codes, or selecting from a list of available codes for your organization.
Click this button to view the codes
Select the appropriate Accounting Code from the previously used codes.
Click this button to view the recent codes

You can change the Billing Cycle by clicking on the dropdown menu.

You can change the Billing Cycle by clicking on the dropdown menu.

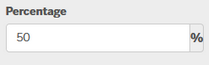
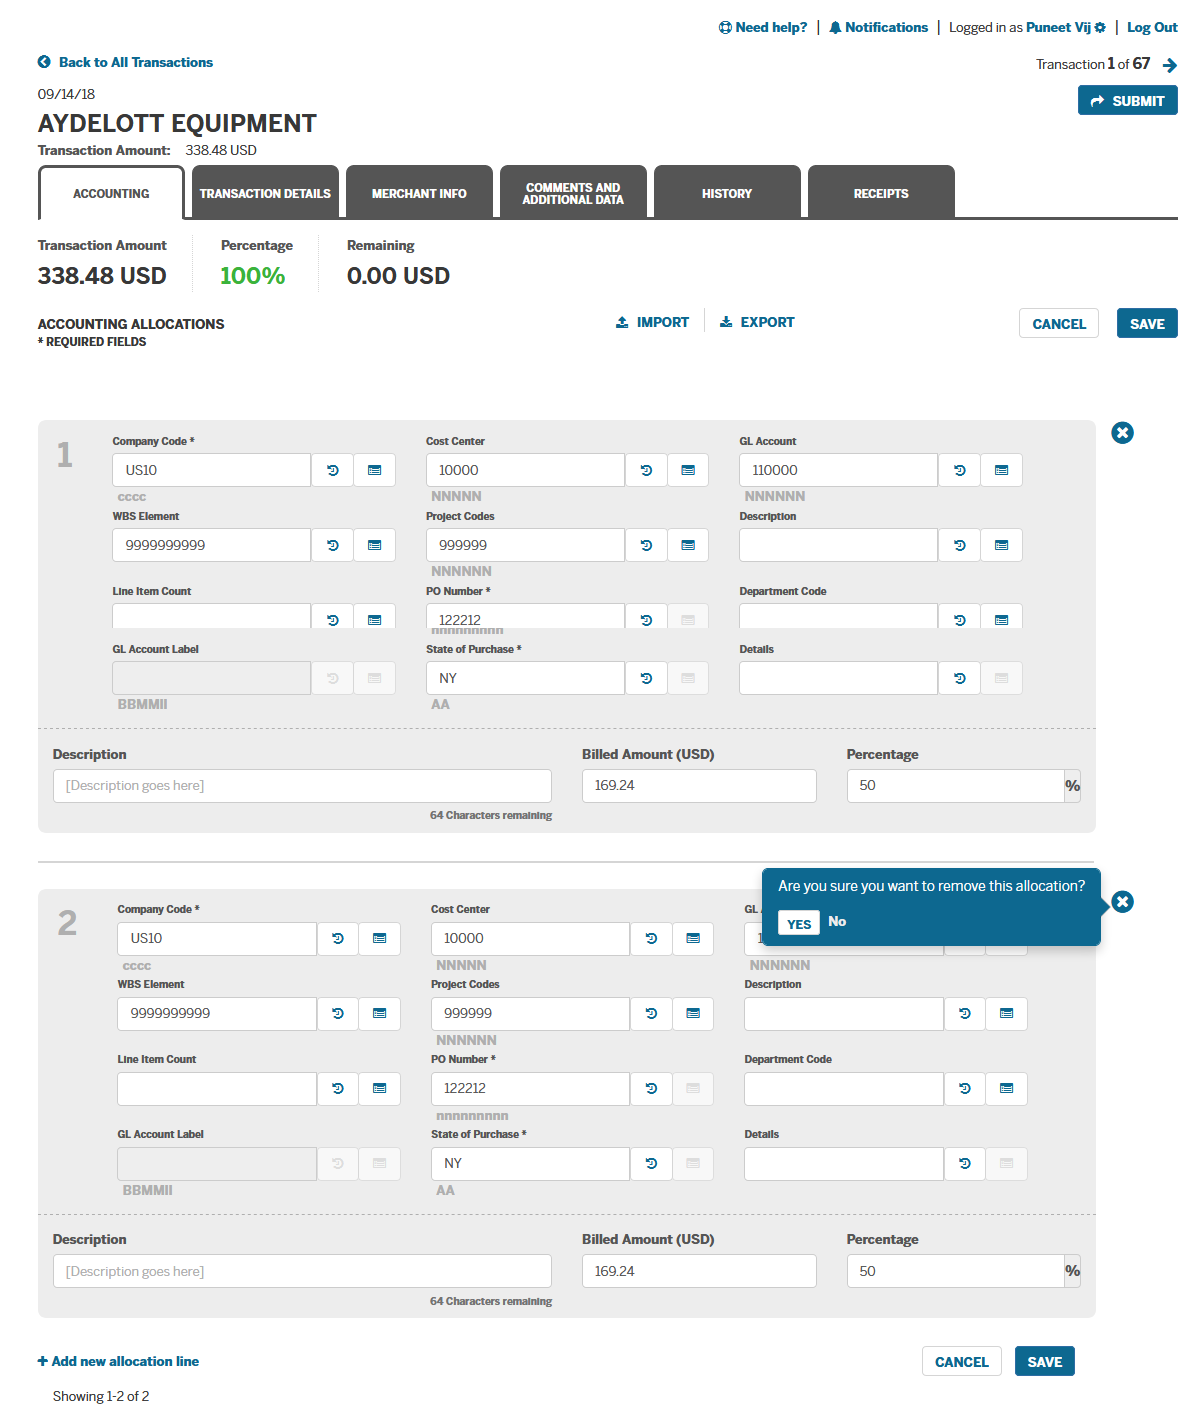
You can split the allocation by amount or percentage. The split totals must add up to 100% of the transaction amount. Once complete, click Save. You can easily remove a split allocation line if necessary by clicking the X to delete.
Use the Accounting tab to view accounting information and reallocate transactions if needed.
Click the Transaction Details tab to view specific transaction information.
Click the Merchant Info tab to review specific details provided by the supplier.
Use the Comments and Additional Data tab to review or add notes to the transaction.
The History tab provides a listing of the last changes made to the transaction.
Use the Receipts tab to upload receipts to the transaction.
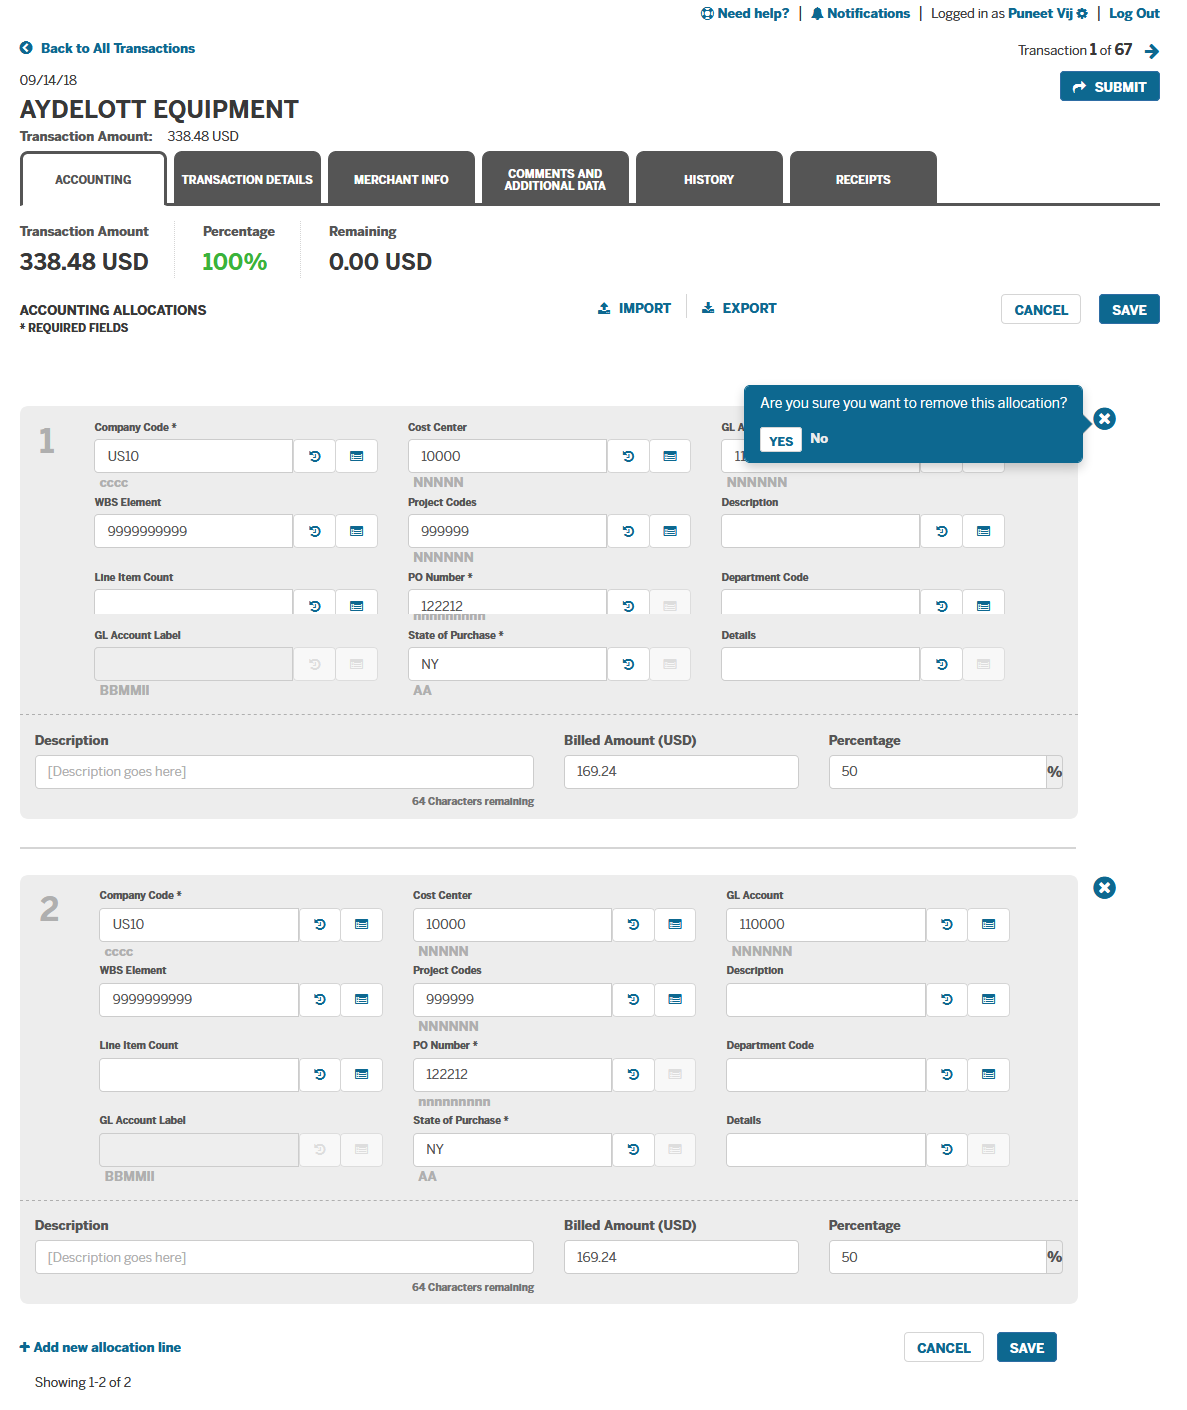
You will be asked to confirm whether or not you wish to delete an allocation

Click Yes to delete and No to keep
Use the Accounting tab to view accounting information and reallocate transactions if needed.
Click the Transaction Details tab to view specific transaction information.
Click the Merchant Info tab to review specific details provided by the supplier.
Use the Comments and Additional Data tab to review or add notes to the transaction.
The History tab provides a listing of the last changes made to the transaction.
Use the Receipts tab to upload receipts to the transaction.
You will be asked to confirm whether or not you wish to delete an allocation
Click Yes to delete and No to keep
Use the Accounting tab to view accounting information and reallocate transactions if needed.
Click the Transaction Details tab to view specific transaction information.
Click the Merchant Info tab to review specific details provided by the supplier.
Use the Comments and Additional Data tab to review or add notes to the transaction.
The History tab provides a listing of the last changes made to the transaction.
Use the Receipts tab to upload receipts to the transaction.
Click the Submit button when you are ready for the transaction allocation to be approved.
Click Homepage to end tour
The Transaction Details tab features specific reference information, as well as the Exception Note if one exists. For example, if the transaction allocation fails validation – the exception notification will be provided here.
Use the Accounting tab to view accounting information and reallocate transactions if needed.
Click the Transaction Details tab to view specific transaction information.
Click the Merchant Info tab to review specific details provided by the supplier.
Use the Comments and Additional Data tab to review or add notes to the transaction.
The History tab provides a listing of the last changes made to the transaction.
Use the Receipts tab to upload receipts to the transaction.
Click the Submit button when you are ready for the transaction allocation to be approved.
Click Homepage to end tour
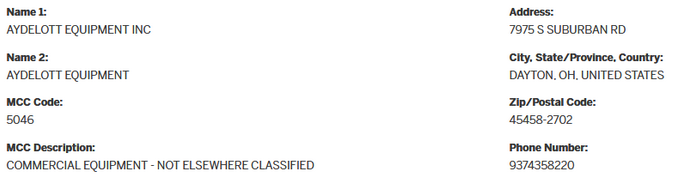
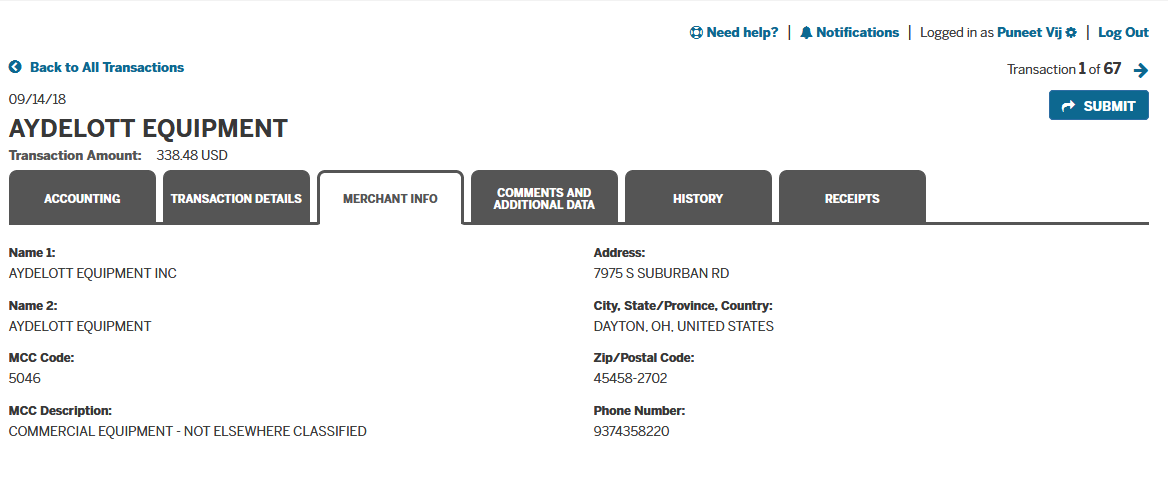
The Merchant Info tab displays additional transaction data sent from the supplier, such as the Merchant Category Code and Description.
Use the Accounting tab to view accounting information and reallocate transactions if needed.
Click the Transaction Details tab to view specific transaction information.
Click the Merchant Info tab to review specific details provided by the supplier.
Use the Comments and Additional Data tab to review or add notes to the transaction.
The History tab provides a listing of the last changes made to the transaction.
Use the Receipts tab to upload receipts to the transaction.
Click the Submit button when you are ready for the transaction allocation to be approved.
Click Homepage to end tour
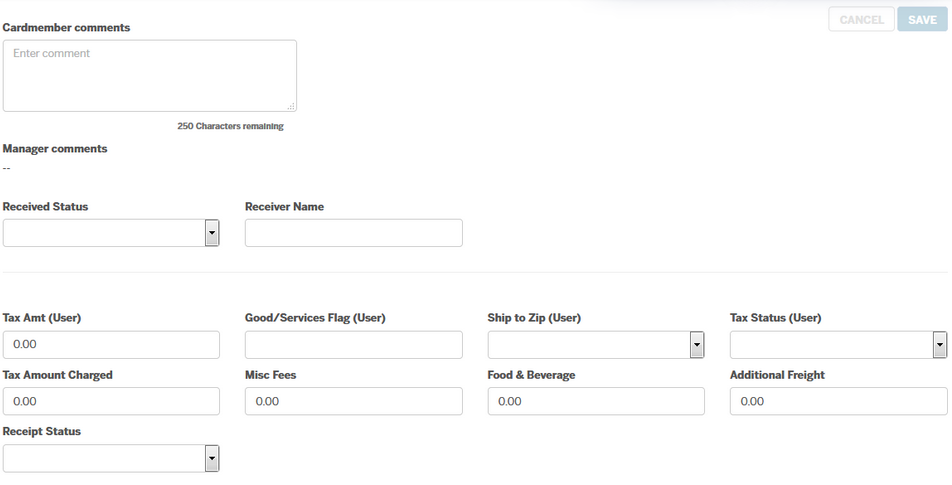
The Comments and Additional Data tab allows the user to add a note or additional data. The comments remain with the transaction for the manager to review.
Use the Accounting tab to view accounting information and reallocate transactions if needed.
Click the Transaction Details tab to view specific transaction information.
Click the Merchant Info tab to review specific details provided by the supplier.
Use the Comments and Additional Data tab to review or add notes to the transaction.
The History tab provides a listing of the last changes made to the transaction.
Use the Receipts tab to upload receipts to the transaction.
Click the Submit button when you are ready for the transaction allocation to be approved.
Click Homepage to end tour
The History tab lists any changes that have been made to the transaction.

Use the Accounting tab to view accounting information and reallocate transactions if needed.
Click the Transaction Details tab to view specific transaction information.
Click the Merchant Info tab to review specific details provided by the supplier.
Use the Comments and Additional Data tab to review or add notes to the transaction.
The History tab provides a listing of the last changes made to the transaction.
Use the Receipts tab to upload receipts to the transaction.
Click the Submit button when you are ready for the transaction allocation to be approved.
Click Homepage to end tour
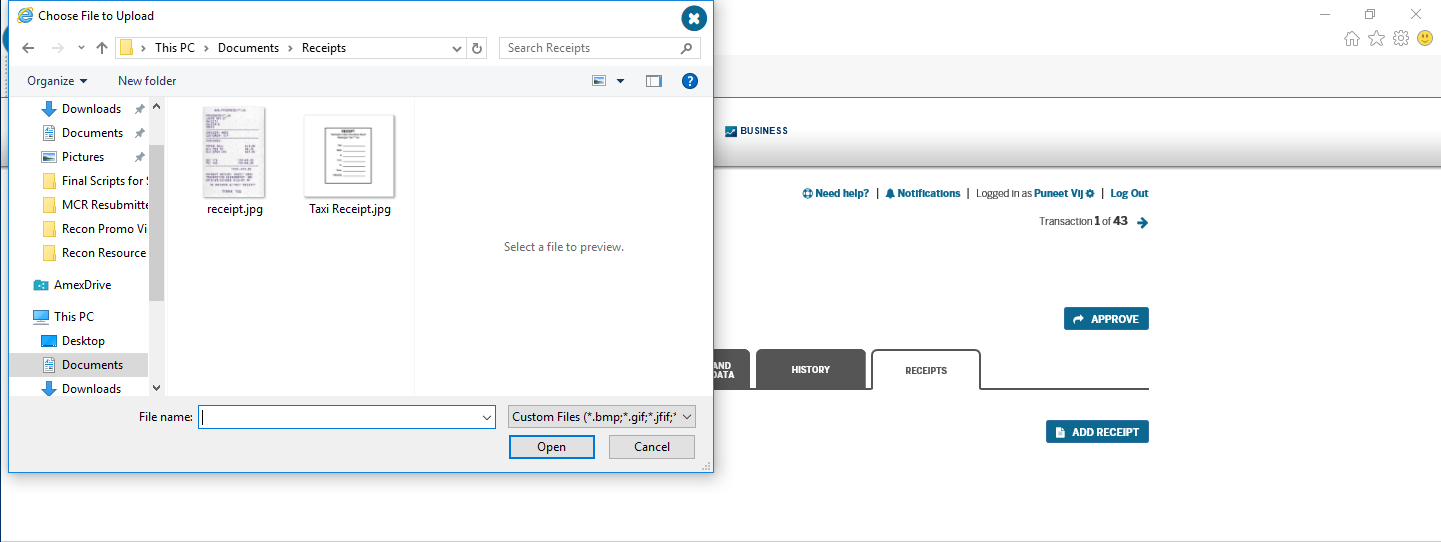
Receipts can be uploaded from your computer or mobile device. They can also be selected from the receipt pool if you have added them in advance.
Select receipt source
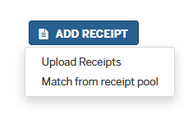


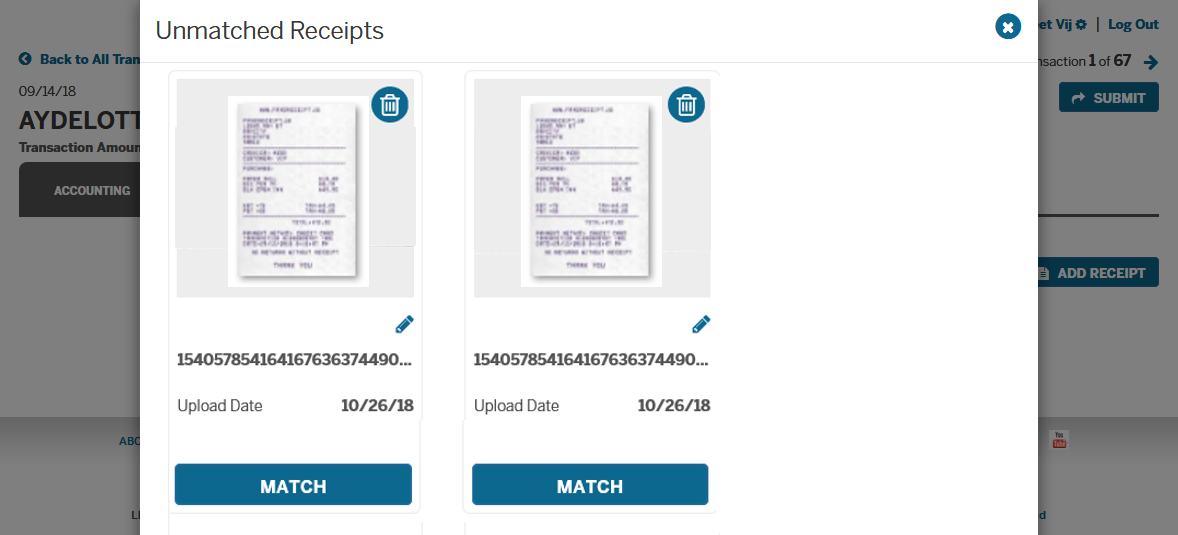
Click Match from receipt pool under the Add Receipt button, then click the Match button to select the receipt.

Use the Accounting tab to view accounting information and reallocate transactions if needed.
Click the Transaction Details tab to view specific transaction information.
Click the Merchant Info tab to review specific details provided by the supplier.
Use the Comments and Additional Data tab to review or add notes to the transaction.
The History tab provides a listing of the last changes made to the transaction.
Use the Receipts tab to upload receipts to the transaction.
Click the Submit button when you are ready for the transaction allocation to be approved.
Click Homepage to end tour
On the Accounting tab, you'll see the default accounting codes applied based on your organization's validation rules. You can accept or change individual allocations as needed.
To split an allocation, add a new allocation line.
Click + Add new allocation line
Change individual allocations by typing a valid code directly into the field, choosing from a list of recently used codes, or selecting from a list of available codes for your organization.
Click this button to view the codes